In Part I, I talked about why I wanted to learn API calls in vRA and how I got my lab environment working. In Part II, I will talk about how I learned how to make an API call.
I relied heavily on Grant Orchard’s getting started guides. I have linked to Part I, II, and III below, with my explanations of how I used his blog to achieve my goal.
Part I – Getting Started [grantorchard.com]
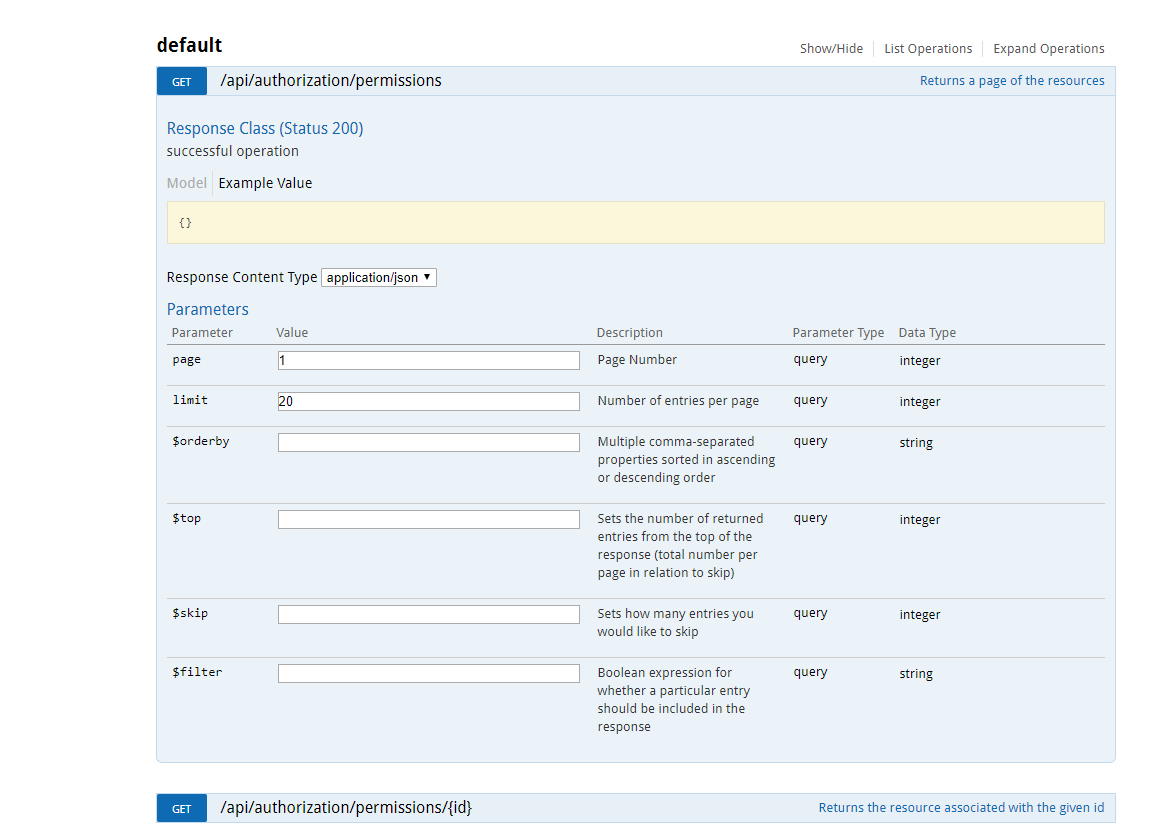
I couldn’t figure out how to browse through API calls because I wasn’t seeing what Grant was showing. It took me forever to realize that at the very bottom of the page, you can click on Show/Hide – then the API calls appear and you can drill into each one for full details.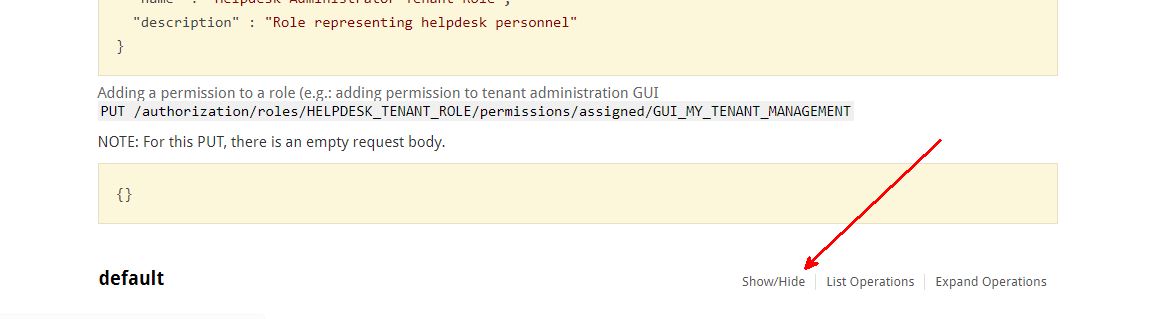
Part II – Building Your First API Call [grantorchard.com]
Grant wrote:
Before we start, perform the following steps.
1. Download Postman.
2. Import this Postman collection of the vRA 7.2 API.
3. Import this Postman environment variables file.
4. Open up the API docs at https://{{vra-fqdn}}/component-registry/services/docs
Postman? What’s Postman? It’s a GUI tool to issue API calls.
What’s a Postman collection? It’s a group of API calls that you can easily click on in the GUI.
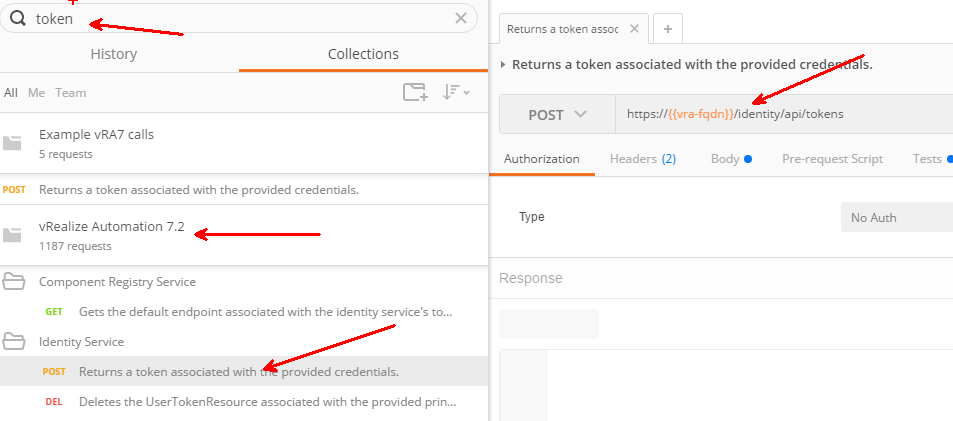
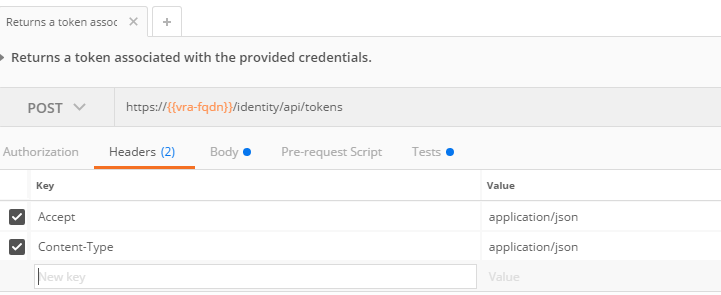
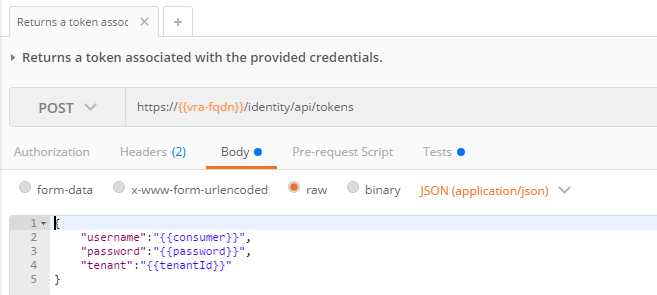
I can easily search a Collection for the API I want. In this case, I know I want to get the Bearer token (Grant explains this, it’s how the API requests are authenticated), so I search for ‘token’. I click on the “returns a token associated with the provided credentials” and it opens up the request complete with the proper URL. It saves me from having to manually piece together the API calls and paste them into Postman.
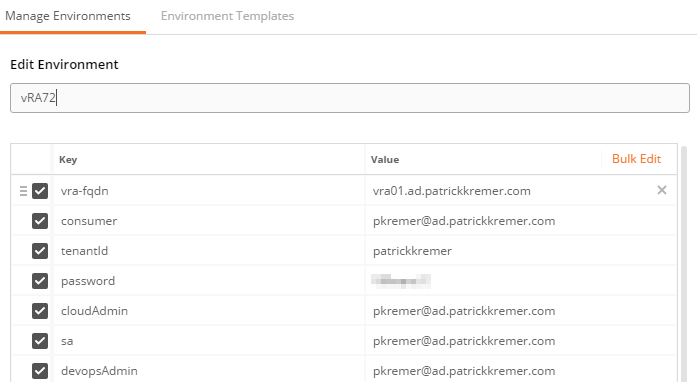
You’ve probably noticed {{vra-fqdn}} in the URL. It’s not just a placeholder. It’s an environment variable.

Grant provided a bunch of environment variables in his post – you can import the environment variables and change them to match your lab environment. You can reference these variables inside Postman.
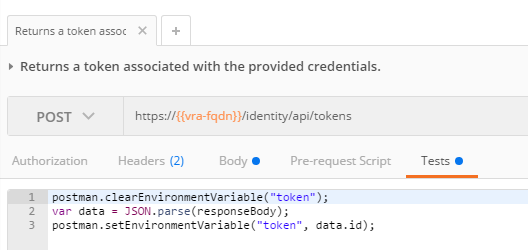
Following Grants example, I opened the token API in Postman. The ‘Tests’ section saves the Bearer token in a variable named “token”.
Part III – Requesting a Catalog Item [grantorchard.com]
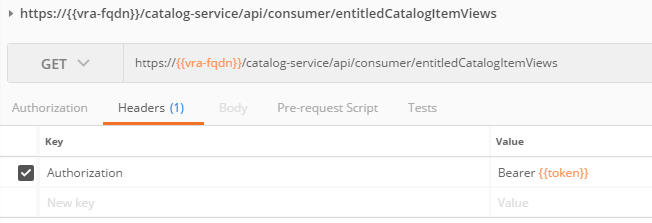
Grant’s post said the API I needed was ‘entitledCatalogItemViews’. You can see that I’m using the {{vra-fqdn}} variable in the URL as well as passing the Bearer {{token}} value. One problem I ran into is that you must have a space between Bearer and {{token}}.
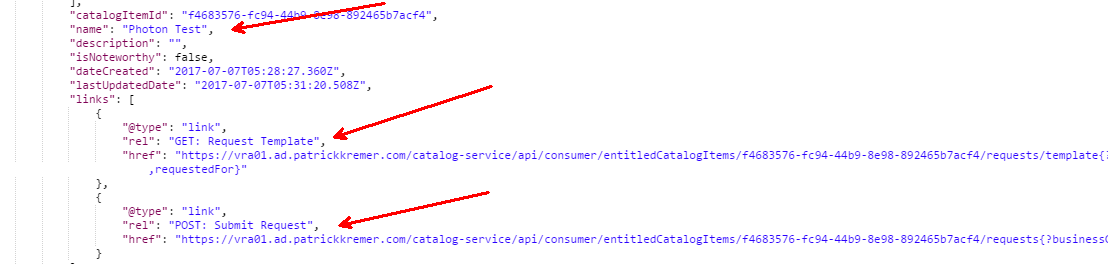
Hit Send and my results come back. I have only one blueprint, a Linked Clone blueprint with Photon Linux in it. You can see two links – one for the GET: Request Template, and the other for the POST: Submit Request. The Request Template will return an example set of JSON showing you how to make the POST call to start the Blueprint.
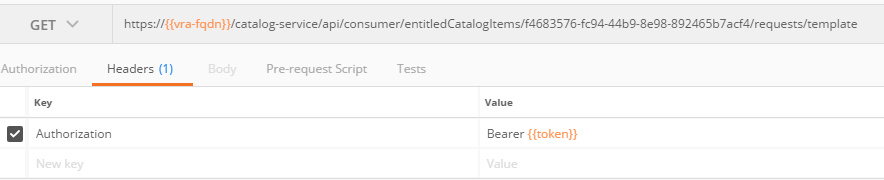
Now I open another Postman tab and paste in the Request Template URL. Add the proper header for Authorization, and hit Send.
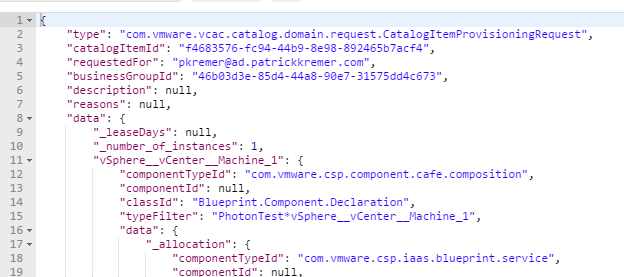
This is just a subset of the JSON I got back. I left the tab open and launched a new tab.
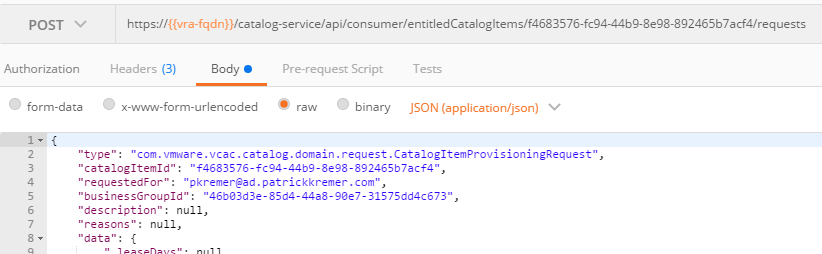
In the new tab, I used the URL in the Submit Request response that I got above. I did the same Authorization header as used previously, and pasted the Template JSON from above into the Body field.
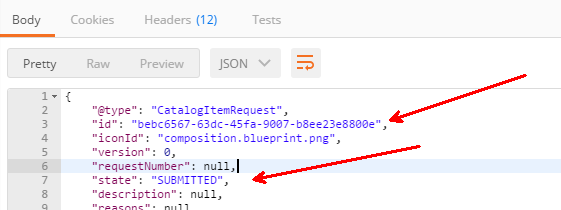
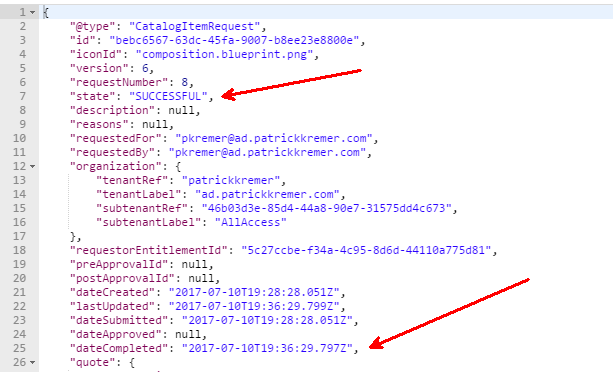
After pressing Send, I got this response in the Body. You can see a Request ID as well as a state of “Submitted”
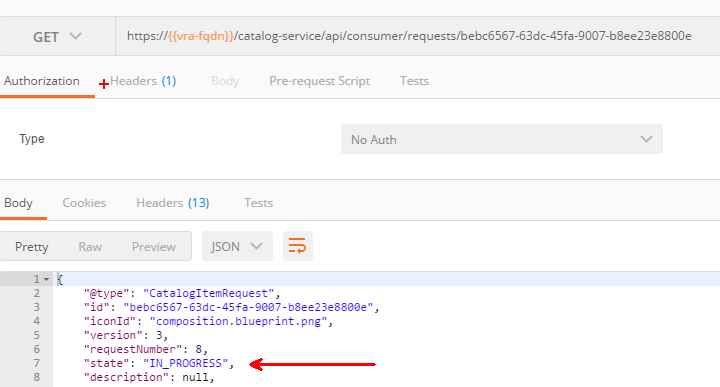
There is also an API where you can check on the state of a request. You can see now that the state has changed from Submitted to In Progress. You can keep
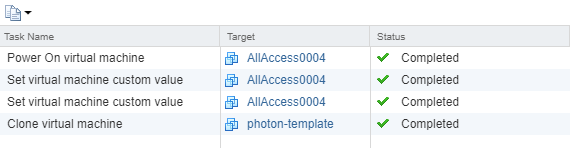
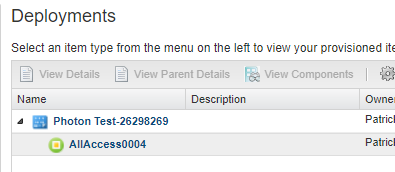
You can see my request in progress inside vRA

You can also see activity in the vSphere Web Client.
You can continue checking on the provisioning status by clicking Send in Postman. You would do the same thing programmatically – periodically ping the API for this asynchronous request to determine when it has completed. We now see that the status code is Successful instead of In Progress
I now have a new Item in vRA.
Now that I know the correct APIs to use, and that they work as expected in my lab environment, I can get to work calling them from Powershell. Part III of the series will document this process.
Invoking the vRealize Automation API – Part I | Patrick Kremer
[…] ← Previous Next → […]