In Part III of this series, we looked active health monitors for the sample web application created by Easy Deploy. In this post, we will extend monitoring of the sample web application by adding check for server maintenance mode.
A network engineering team does not need to be involved in website maintenance – the load balancer can be configured to detect maintenance and transparently route traffic away from the impacted node. As a developer, you should not need to involve the load balancer team to perform routine maintenance on your web application. A developer can control the behavior of the load balancer by having a maintenance mode health check configured on their application’s pool.
There are several operations in this post that you may be unfamiliar with. Don’t worry! I will explain it all to you. You will perform the following in this post:
- Add a user account to a Linux server and add it to the sudo group
- Install the scripting language PHP using apt
- Download PHP code by cloning a Git repository
- Use curl to make an HTTP request
- Create a health monitor and configure server maintenance mode
We continue to use the existing Ubuntu Linux webservers from the sample app provided by the Easy Deploy appliance.
Configure SSH access to webservers
Note: in this section, you should perform the operations on both webservers.
I don’t want to keep having to run the same docker exec command to get into the webservers as shown in the Apache section of Part III. I will configure the webservers so I can SSH directly. As a reminder from the previous section, the commands to run from the EasyDeploy appliance are:
docker exec -it easyavi /bin/bash
cd /root/.ssh
ssh -i id_rsa ubuntu@x.x.x.x
Note: If you’re already comfortable using password-free logins, you can skip adding the user account and download the RSA key to your local workstation. You could then do the rest of the tasks SSHing as the ubuntu user.
Once SSHed into the webserver, add a user account.
sudo su
adduser pkremer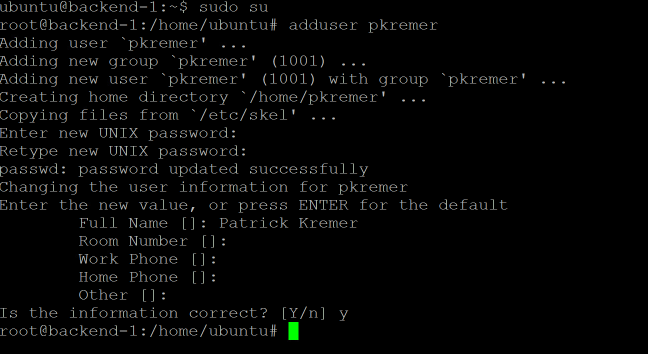
The account needs to be able to gain root access; add it to the sudo group, then switch into it.
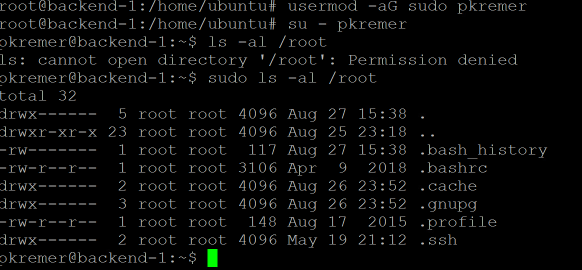
usermod -aG sudo pkremer
su - pkremer
Try to list the /root directory – it fails without sudo, but succeeds with sudo.
ls -al /root
sudo ls -al /root
Here is the SSH window output:
It is now possible to SSH directly to the web node without first connecting to the Easy Deploy appliance.
Remember: Configure both web nodes identically.
Install PHP
Note: in this section, you should perform the operations on both webservers.
PHP is a server side scripting language. This section uses PHP to create a dynamic maintenance page to notify the load balancer that the web server is undergoing maintenance.
Update apt, then install PHP and the apache2 PHP module.
apt update
apt install php libapache2-mod-php
The installation should enable PHP, but run the command to make sure.
a2enmod php7.2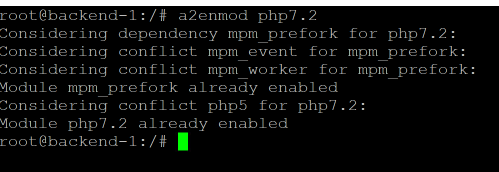
Reload the Apache webserver
/etc/init.d/apache2 reload
Remember: Configure both web nodes identically.
Download the Maintenance Page
Note: in this section, you should perform the operations on both webservers.
The code for this post can be found in Github. Github is a central repository for code, allowing many developers to work simultaneously on a single codebase. git is a utility used to manipulate code. I wrote a post on using Git to contribute to an open source project, you can check it out for further learning.
The git clone operation shown below will create an exact copy of a project on the webservers.
SSH to backend-0 and su to root, then cd to /var/www/html – this is the default directory for webpages.
sudo su
cd /var/www/html
Clone the code in the Github repo.
git clone https://github.com/kremerpatrick/avi.git
Remember: Configure both web nodes identically.
Test the Maintenance Page
Note: in this section, you should perform the operations on both webservers.
Let’s look at the maintenance page. cd to the newly cloned directory, look at the files and show the maint.php file.
cd avi
ls -al
cat maint.php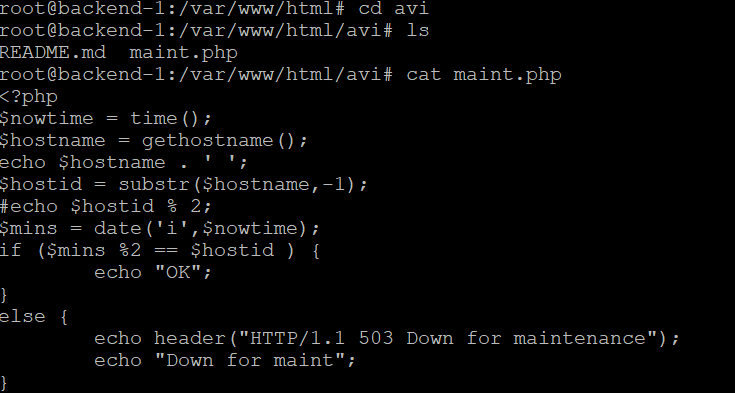
The code is designed to alternate placing the webservers in maintenance mode every minute. You obviously wouldn’t take a webserver in and out of maintenance mode every minute in a real-world scenario – this is just for illustrative purposes. The simulation is a bare-bones example of how a developer might write code in their application to cleanly take down a node without having to involve a member of the load balancer team. During maintenance, the maintenance page sends HTTP code 503.
backend-0 will be available during even-numbered minutes
backend-1 will be available during odd-numbered minutes.
<?php
$nowtime = time();
$hostname = gethostname();
echo $hostname . ' ';
$hostid = substr($hostname,-1);
$mins = date('i',$nowtime);
if ($mins %2 == $hostid ) {
        echo "OK";
}
else {
        echo header("HTTP/1.1 503 Down for maintenance");
        echo "Down for maint";
}
?>
Check the date and time by using the date command. Then run the curl command to execute maint.php
date
curl http://10.47.167.25/avi/maint.php
Your output will depend on what time it is when you run the command. In this case we were in an odd-numbered minute, so backend-0 showed down.
Run the commands again during an even-numbered minute and backend-0 will show OK.

On backend-1, run the same commands. The web server will show OK during odd numbered minutes and down for maintenance during even numbered minutes.


Remember: Configure both web nodes identically.
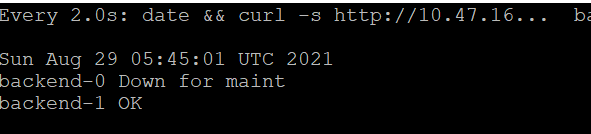
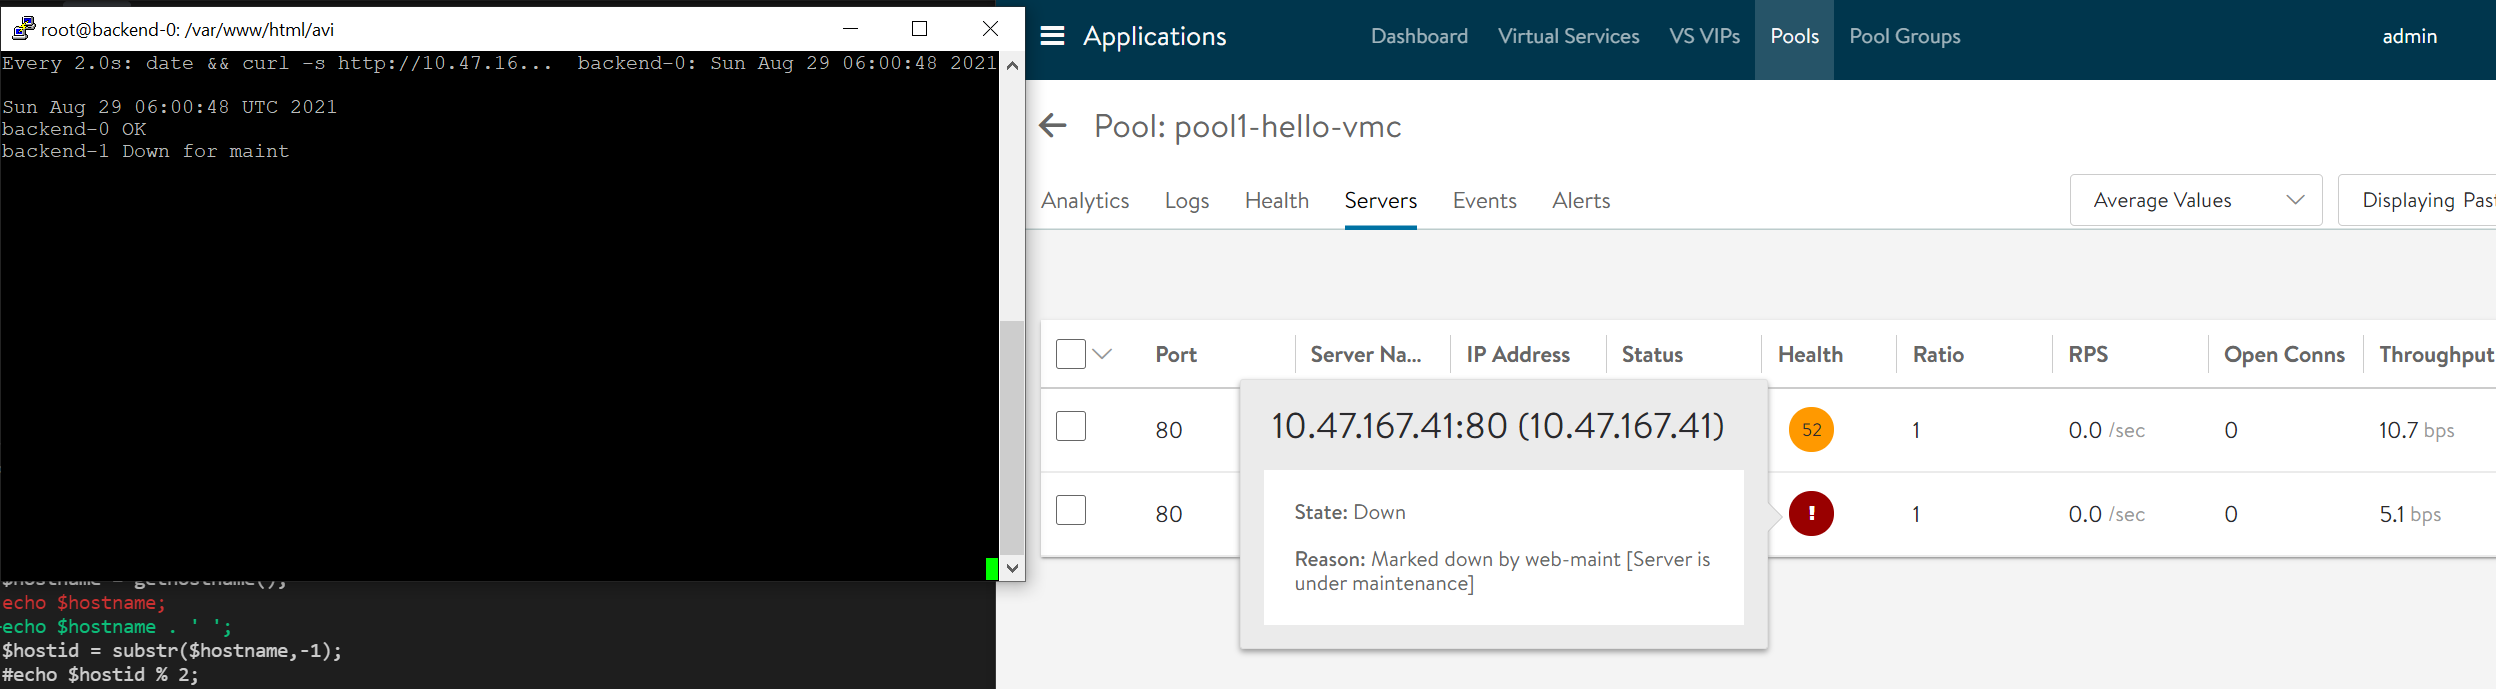
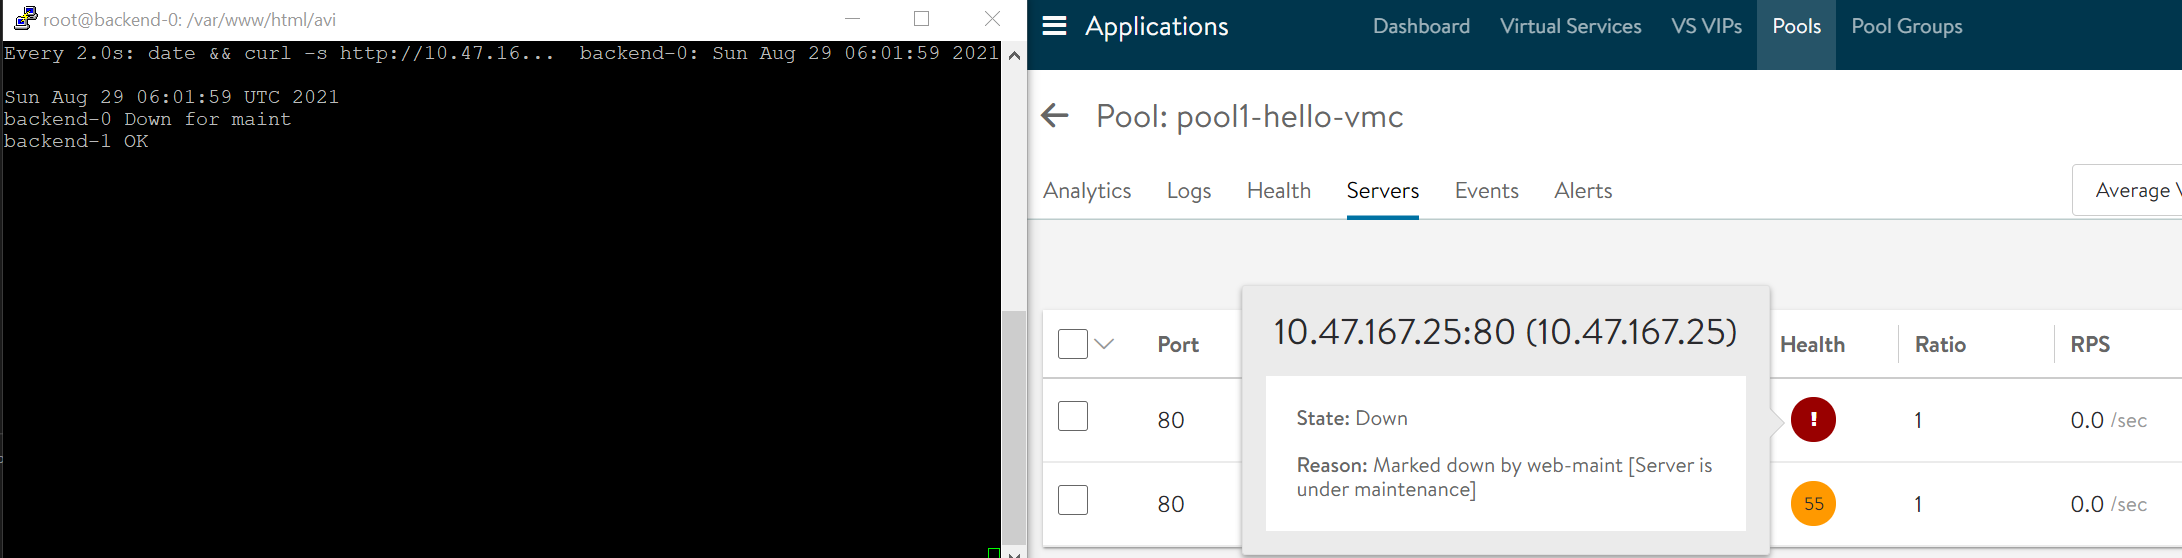
On either webserver, run the watch command. watch lets you run a command or set of commands repeatedly. In this case the maintenance pages on both webservers are being called every 2 seconds.
watch "date && curl -s http://10.47.167.25/avi/maint.php && echo "" && curl -s http://10.47.167.41/avi/maint.php"We see one node down and the other one up. The screen refreshes every 2 seconds.

When a minute passes, the nodes will flip.
Create a Health Monitor
Under Templates, click on Health Monitors, then click Create

Name it ‘web-maint’ and set it to HTTP

Change the user input to
GET /avi/maint.php HTTP/1.1This will cause the health check to fetch the maintenance page.

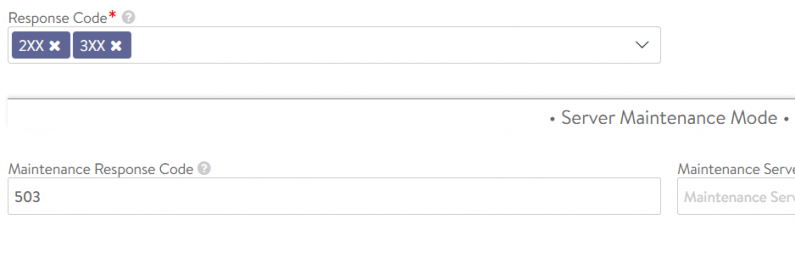
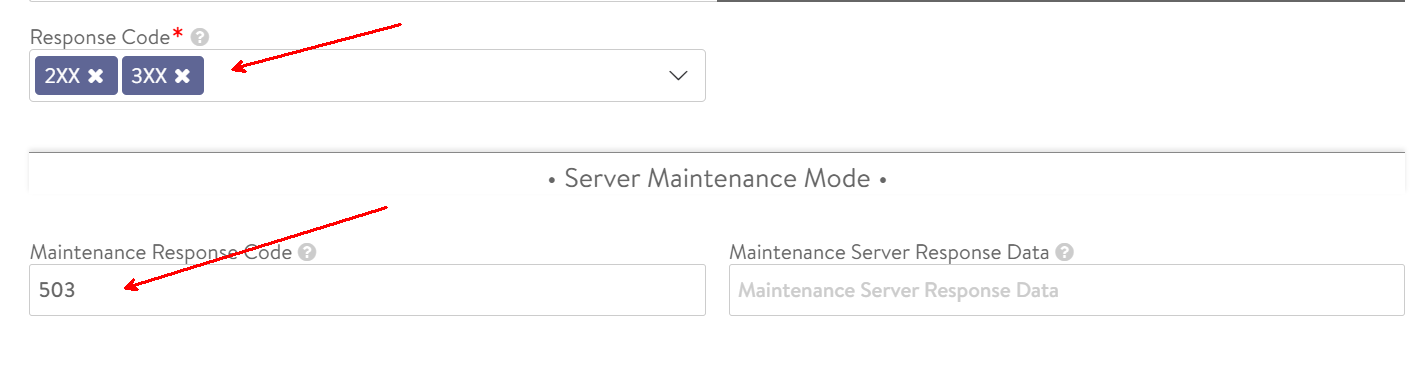
Put 2xx and 3xx in the Response Code – these are successful responses. Then put code 503 for the maintenance response code. When a server is placed in maintenance mode, no new connections are sent to it and existing connections are drained.
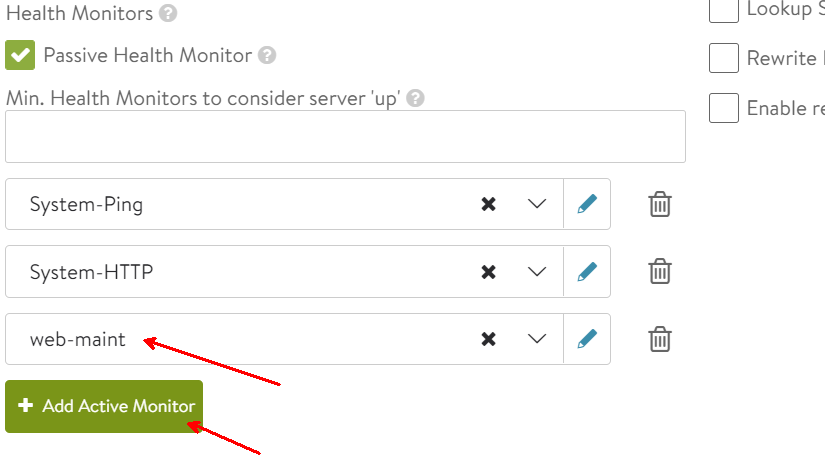
Back under Applications>Pools, edit pool pool-hello-vmc. Add the web-maint active monitor and click Save.
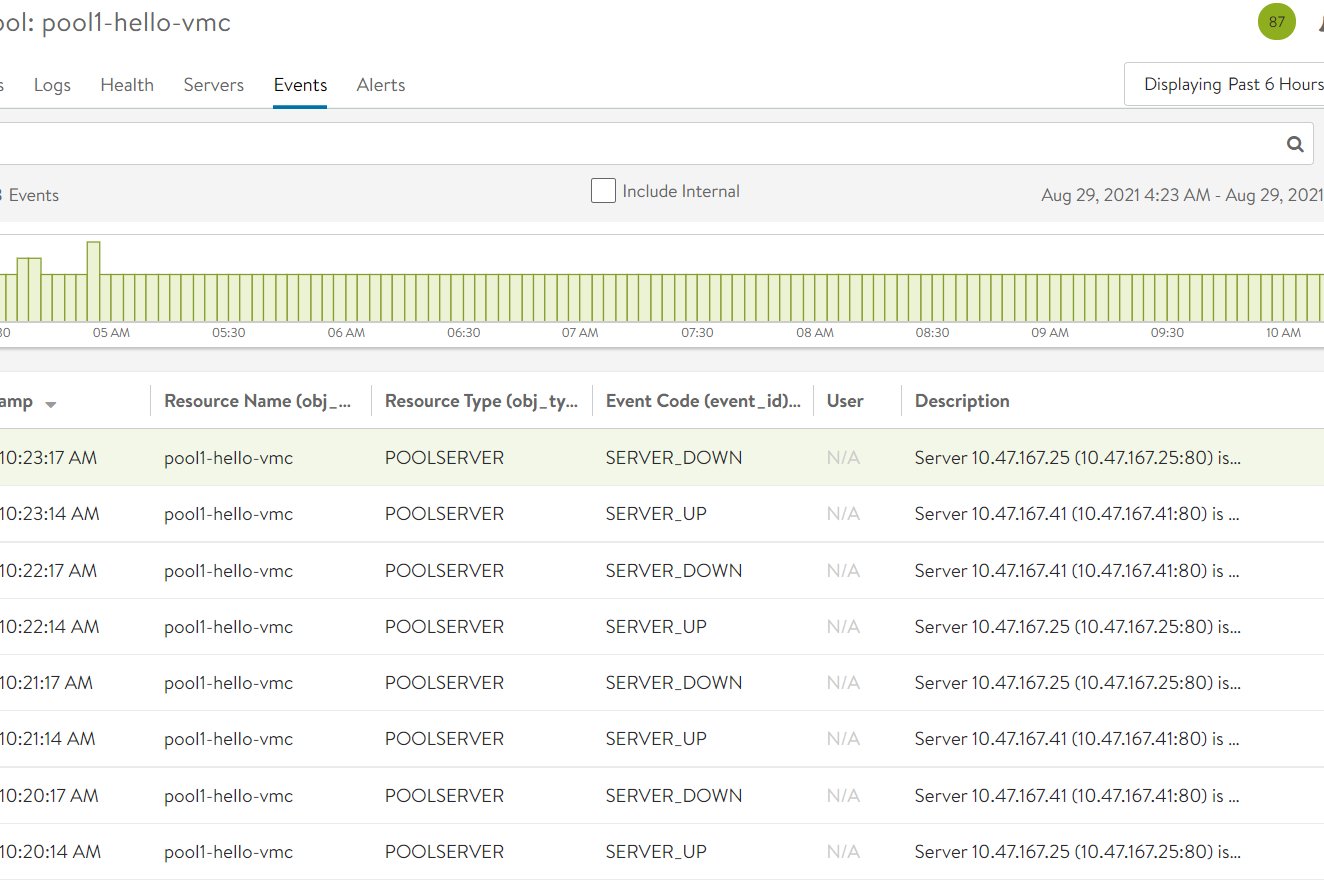
The pool will flip back and forth between the nodes every minute. Again, this is not behavior that you’d typically want out of a production web application – this maintenance page was designed to cause a load balancing change every 60 seconds.
Looking in the pool’s logs under the Events tab, you will see the nodes flipping every minute.
Summary
In this post, we covered how to build a monitor with server maintenance mode. If you haven’t worked with Linux and Git much, or at all, you may have felt uncomfortable with the commands. That’s OK! Everybody starts off knowing no commands. As with anything, practice creates familiarity.
NSX Advanced Load Balancer – Part III – Active HTTP Monitor -
[…] all for this post. In the next post, we will explore health check maintenance mode […]